Basic effect
On this page, you will explore the fundamentals of how a shader works and discover techniques for creating a variety of interesting effects. By understanding the underlying principles, you'll be able to enhance your projects with visually stunning elements.
How it works
When we create a function for our shader, we are creating a function that is executed for each pixel of an image. This function allows us to manipulate various parameters, to achieve the desired visual effects, such as color and position.
Upside Engine provides a typed table containing all the necessary variables. This approach simplifies the function interface by eliminating the need for numerous parameters, as the table's structure ensures that all required variables are clearly defined and accessible.
Shader variables
- red Represents the red intensity of the pixel, with a value ranging from 0 to 255.
- green Represents the green intensity of the pixel, with a value ranging from 0 to 255.
- blue Represents the blue intensity of the pixel, with a value ranging from 0 to 255.
- opacity Represents the opacity of the pixel, with a value ranging from 0 to 255.
- x Represents the position of the pixel on the X-axis.
- y Represents the position of the pixel on the Y-axis.
Inverting the color of our image
If we want to invert the colors of our image, we just need to return to our Shader.luau script and write the following code:
local replicatedStorage = game:GetService("ReplicatedStorage")
local packages = replicatedStorage:WaitForChild("packages")
local upsideEngine = require(packages:WaitForChild("UpsideEngine"))

@native
local function shadingFunction(params: upsideEngine.ShadingParams)
    params.red = 255 - params.red
    params.green = 255 - params.green
    params.blue = 255 - params.blue
end

return shadingFunction
Since all values range from 0 to 255, subtracting each color value from 255 inverts the pixel's color for that channel.

Water Shader
Let's take it a step further and create an interesting effect, such as a water effect. We can achieve this using the following code:
local replicatedStorage = game:GetService("ReplicatedStorage")
local packages = replicatedStorage:WaitForChild("packages")
local upsideEngine = require(packages:WaitForChild("UpsideEngine"))

@native
local function shadingFunction(params: upsideEngine.ShadingParams)
    local clock = os.clock()
    local speed = 10

    local amplitude = 0.1
    local waveSize = 1

    local timeFactor = clock * speed
    local offset = params.x * amplitude + params.y * amplitude

    params.x += math.sin(timeFactor + offset) * waveSize
    params.y += math.cos(timeFactor + offset) * waveSize
end

return shadingFunction
clock continuously increases, causing our shader to move constantly. The x and y variables help the shader move diagonally, adding more realism to the effect. If we only used x, the shader would move horizontally, and similarly, if we only used y, it would move vertically.
math.sin and math.cos are functions that return values ranging from -1 to 1. These functions help create the wave patterns that give the water effect its characteristic movement.
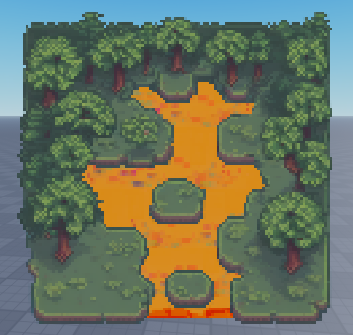
As you can see at the bottom of the image, there is a blue gradient that seems unrelated to our image. But why does this happen? When we modify the position of a pixel in our shader, gaps can appear in the image. Upside Engine automatically fills these gaps in a way that is not noticeable, which results in this effect.
Fortunately, there is a property that allows us to fix this issue: Precision. The values for this property should be between 0 and 1. Adjust the value as needed to ensure your shader appears as expected. For example, changing Precision to 0.75 resolves the problem.