Installation
Working-with-roblox-studio
This tutorial is oriented to external code editors, so there are probably some terms that you do not understand if you only use roblox studio, so here are some clarifications:
- When the tutorial talks about
whatever.client.luauorwhatever.server.luau:- in the .client case is talking about a local script inside StarterPlayerScripts.
- in the .server case is talking about a script inside ServerScriptService.
- When the tutorial talks about any script like for example
whatever.client.luau, the script's name would be everything before the first dot. In this case, it would be "whatever". - When the tutorial doesn't specify if a script is a local script or a server script in the script name (example:
whatever.luau), the tutorial is talking about a module script. - When we talk about
src/clientwe are are talking aboutStarterPlayerScripts.
Follow this steps to "install" the package in roblox studio
- Create a folder in ReplicatedStorage and then name it as "packages"
- Place the upside engine module in the packages folder (click on the download button below to get the module)
- Once you finished the steps before, continue the tutorial in the "An important step" section.
Project Setup
For this tutorial, we will need the following:
- Initialize Git
- Start a new project with Rojo
Downloading Upside Engine
To install Upside Engine, you can use github submodules or wally
Github submodules
To install upside engine using github submodules run this command:
git submodule add https://github.com/notreux/UpsideEngine packages/UpsideEngine
Wally
To install upside engine with wally add this line to your wally.toml:
UpsideEngine = "notreux/upsideengine@3.0.0"
Recommended Rojo Template (optional)
Info
{
   "name": "My first 2D Game",
    "tree": {
        "$className": "DataModel",
        "ReplicatedStorage": {
            "$className": "ReplicatedStorage",
            "packages": {
                "$className": "Folder",
                "$path": "packages"
            }
        },

        "StarterPlayer": {
            "$className": "StarterPlayer",
            "StarterPlayerScripts": {
                "$className": "StarterPlayerScripts",
                "client":{
                    "$path": "src/client"
                }
            }
        },

        "ServerScriptService": {
            "$className": "ServerScriptService",
            "server": {
                "$path":"src/server"
            }
        }
    }
}
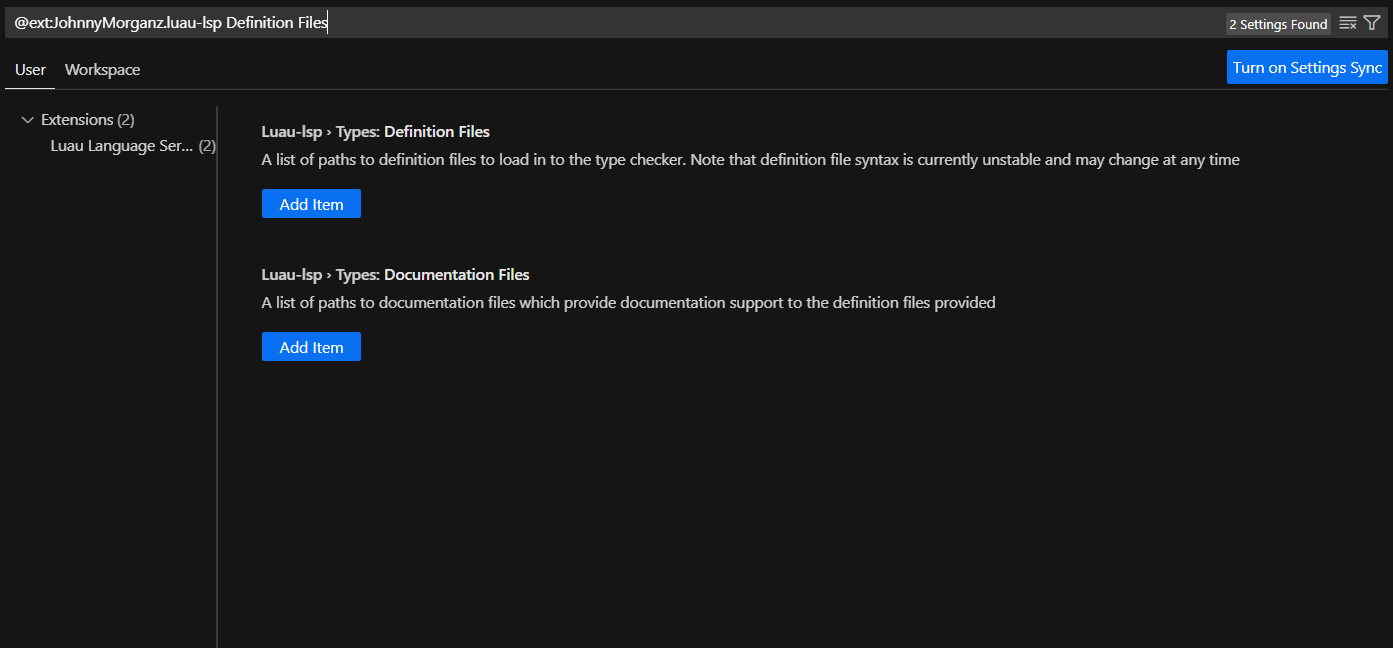
Recommended LSP (optional)
For the best experience, we recommend to use the LuauLSP extension for Visual Studio Code. Once you have installed LuauLSP then go to extension settings and search “Definition Files”
Typescript-types
You can also use TypeScript, just make sure you have roblox-ts installed
Github submodules
If you are using github submodules, click on "Add Item" and then enter this path packages/UpsideEngine/src/init.d.luau.
Wally
Warning
In the paths below change VERSION for the version you are using, for example, if you use the version 3.0.0 change the path to Packages/_Index/notreux_upsideengine@3.0.0/upsideengine/src/init.d.luau
If you are using wally, click on "Add Item" and then enter this path Packages/_Index/notreux_upsideengine@VERSION/upsideengine/src/init.d.luau.
An important step
To ensure that the Upside Engine works correctly, it is important to initialize the engine on the server, even if you are not using any server-side functionality. This is because some services, such as NetworkingService, depend on the server side.
We will create a new script initializer.server.luau in ServerScriptService with the following content:
local replicatedStorage = game:GetService("ReplicatedStorage")
local packages = replicatedStorage.packages

local upsideEngine = require(packages.UpsideEngine)
print("Upside Engine version: " .. upsideEngine.Version)